Configuration
Please follow below steps for configuration,
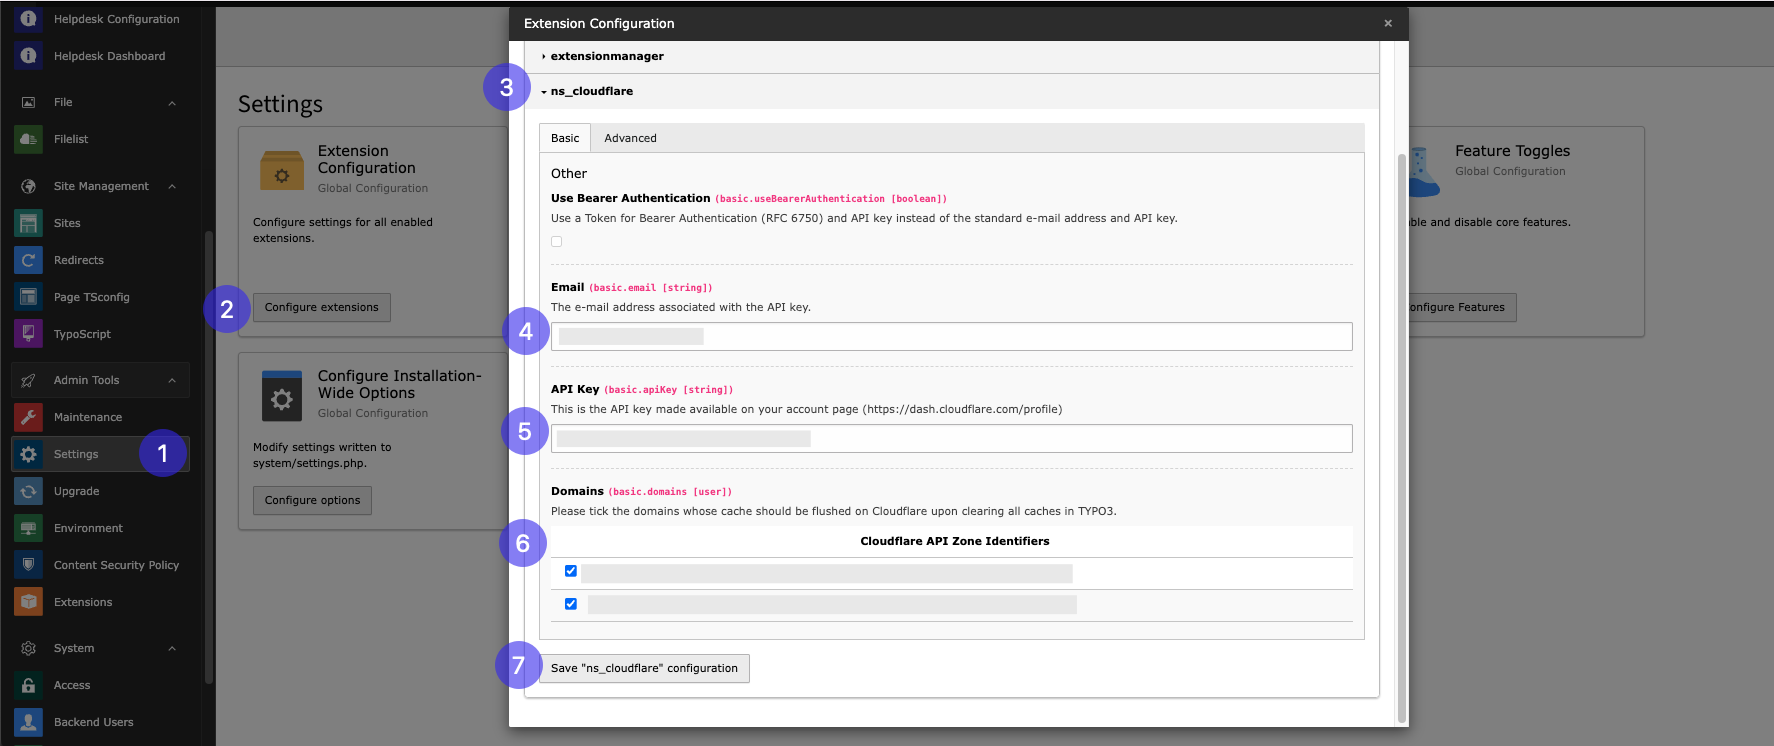
Step 1: Go to Setting
Step 2: Click on configure extenions
Step 3: Select ns_cloudflare
Step 4: Add email address added while creating cloudflare account
Step 5: Add API key
Step 6: Select domain which you want to Enable for cloudflare
Step 7: Click on “Save “n_cloudflare” configuration”
Step 5: Add API Script,here is Step by step setup guild for setup cookieyes https://www.cookieyes.com/documentation/cookieyes-setup-guide/ add scrip from it and configure it.
For API key check this Ref. link for step by step guidance https://developers.cloudflare.com/api/
Advanced
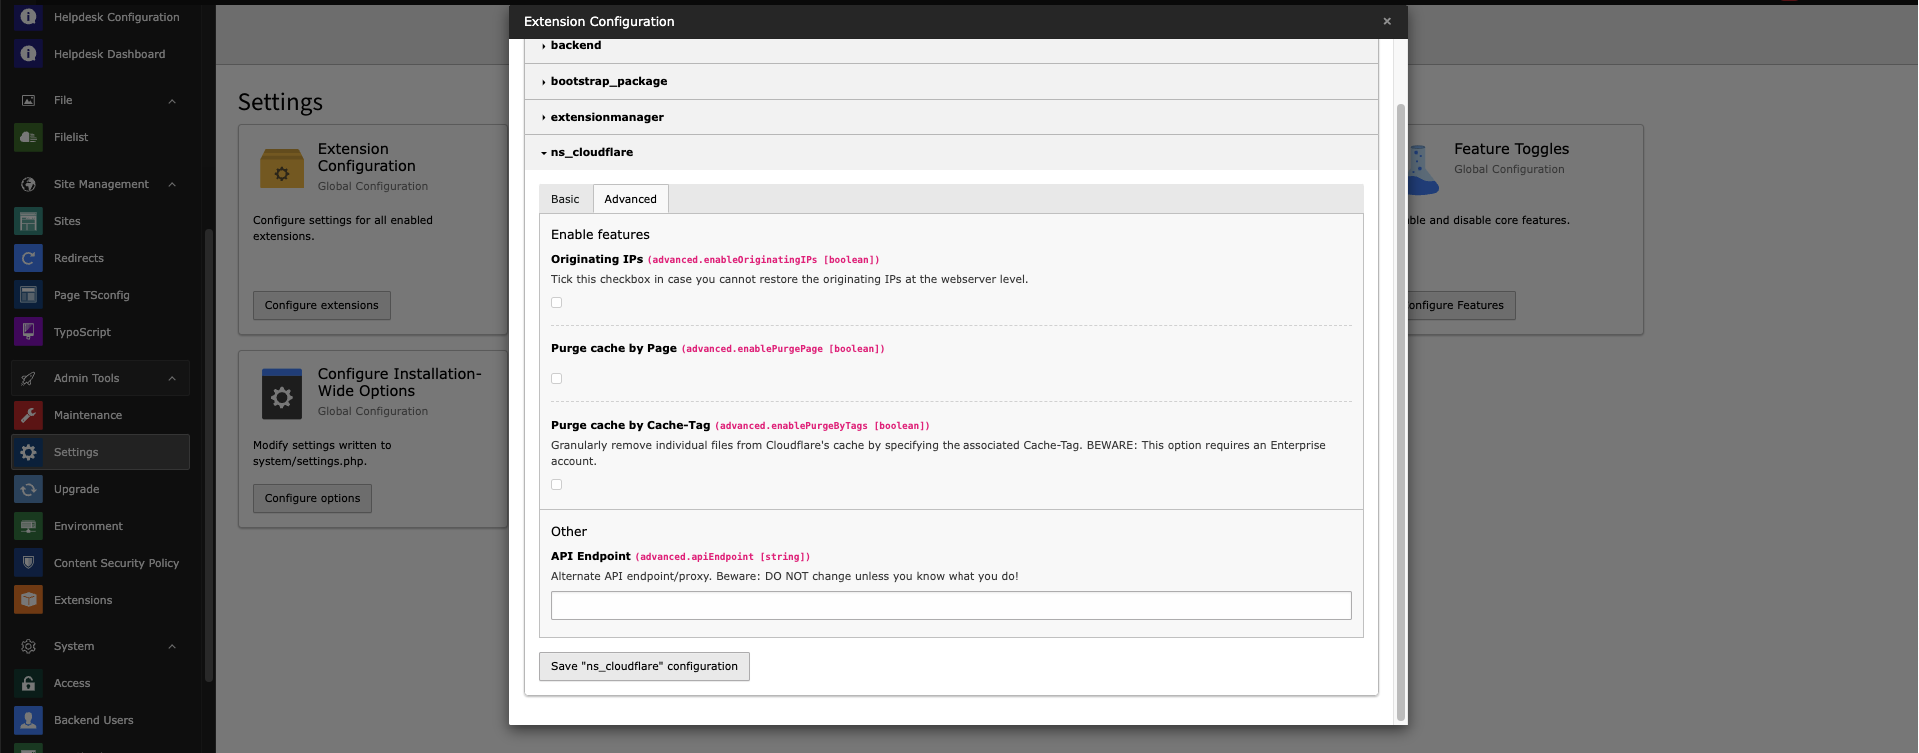
Originating IPs: This checkbox allows you to restore the originating IPs.
Purge catch by Page: If thi checkbox is enabled then,you can clear cloudflare cach by clearing page cache.
Purge cache by cache-Tag: This checkbox allows you to purge individual files on Cloudflare’s cache using the associated Cache-Tag.
API Endpoint: An alternate API endpoint/proxy for Cloudflare.
Now we have done with all the steps so finally you will able to ue this extenion
Check below feature of this extenion,
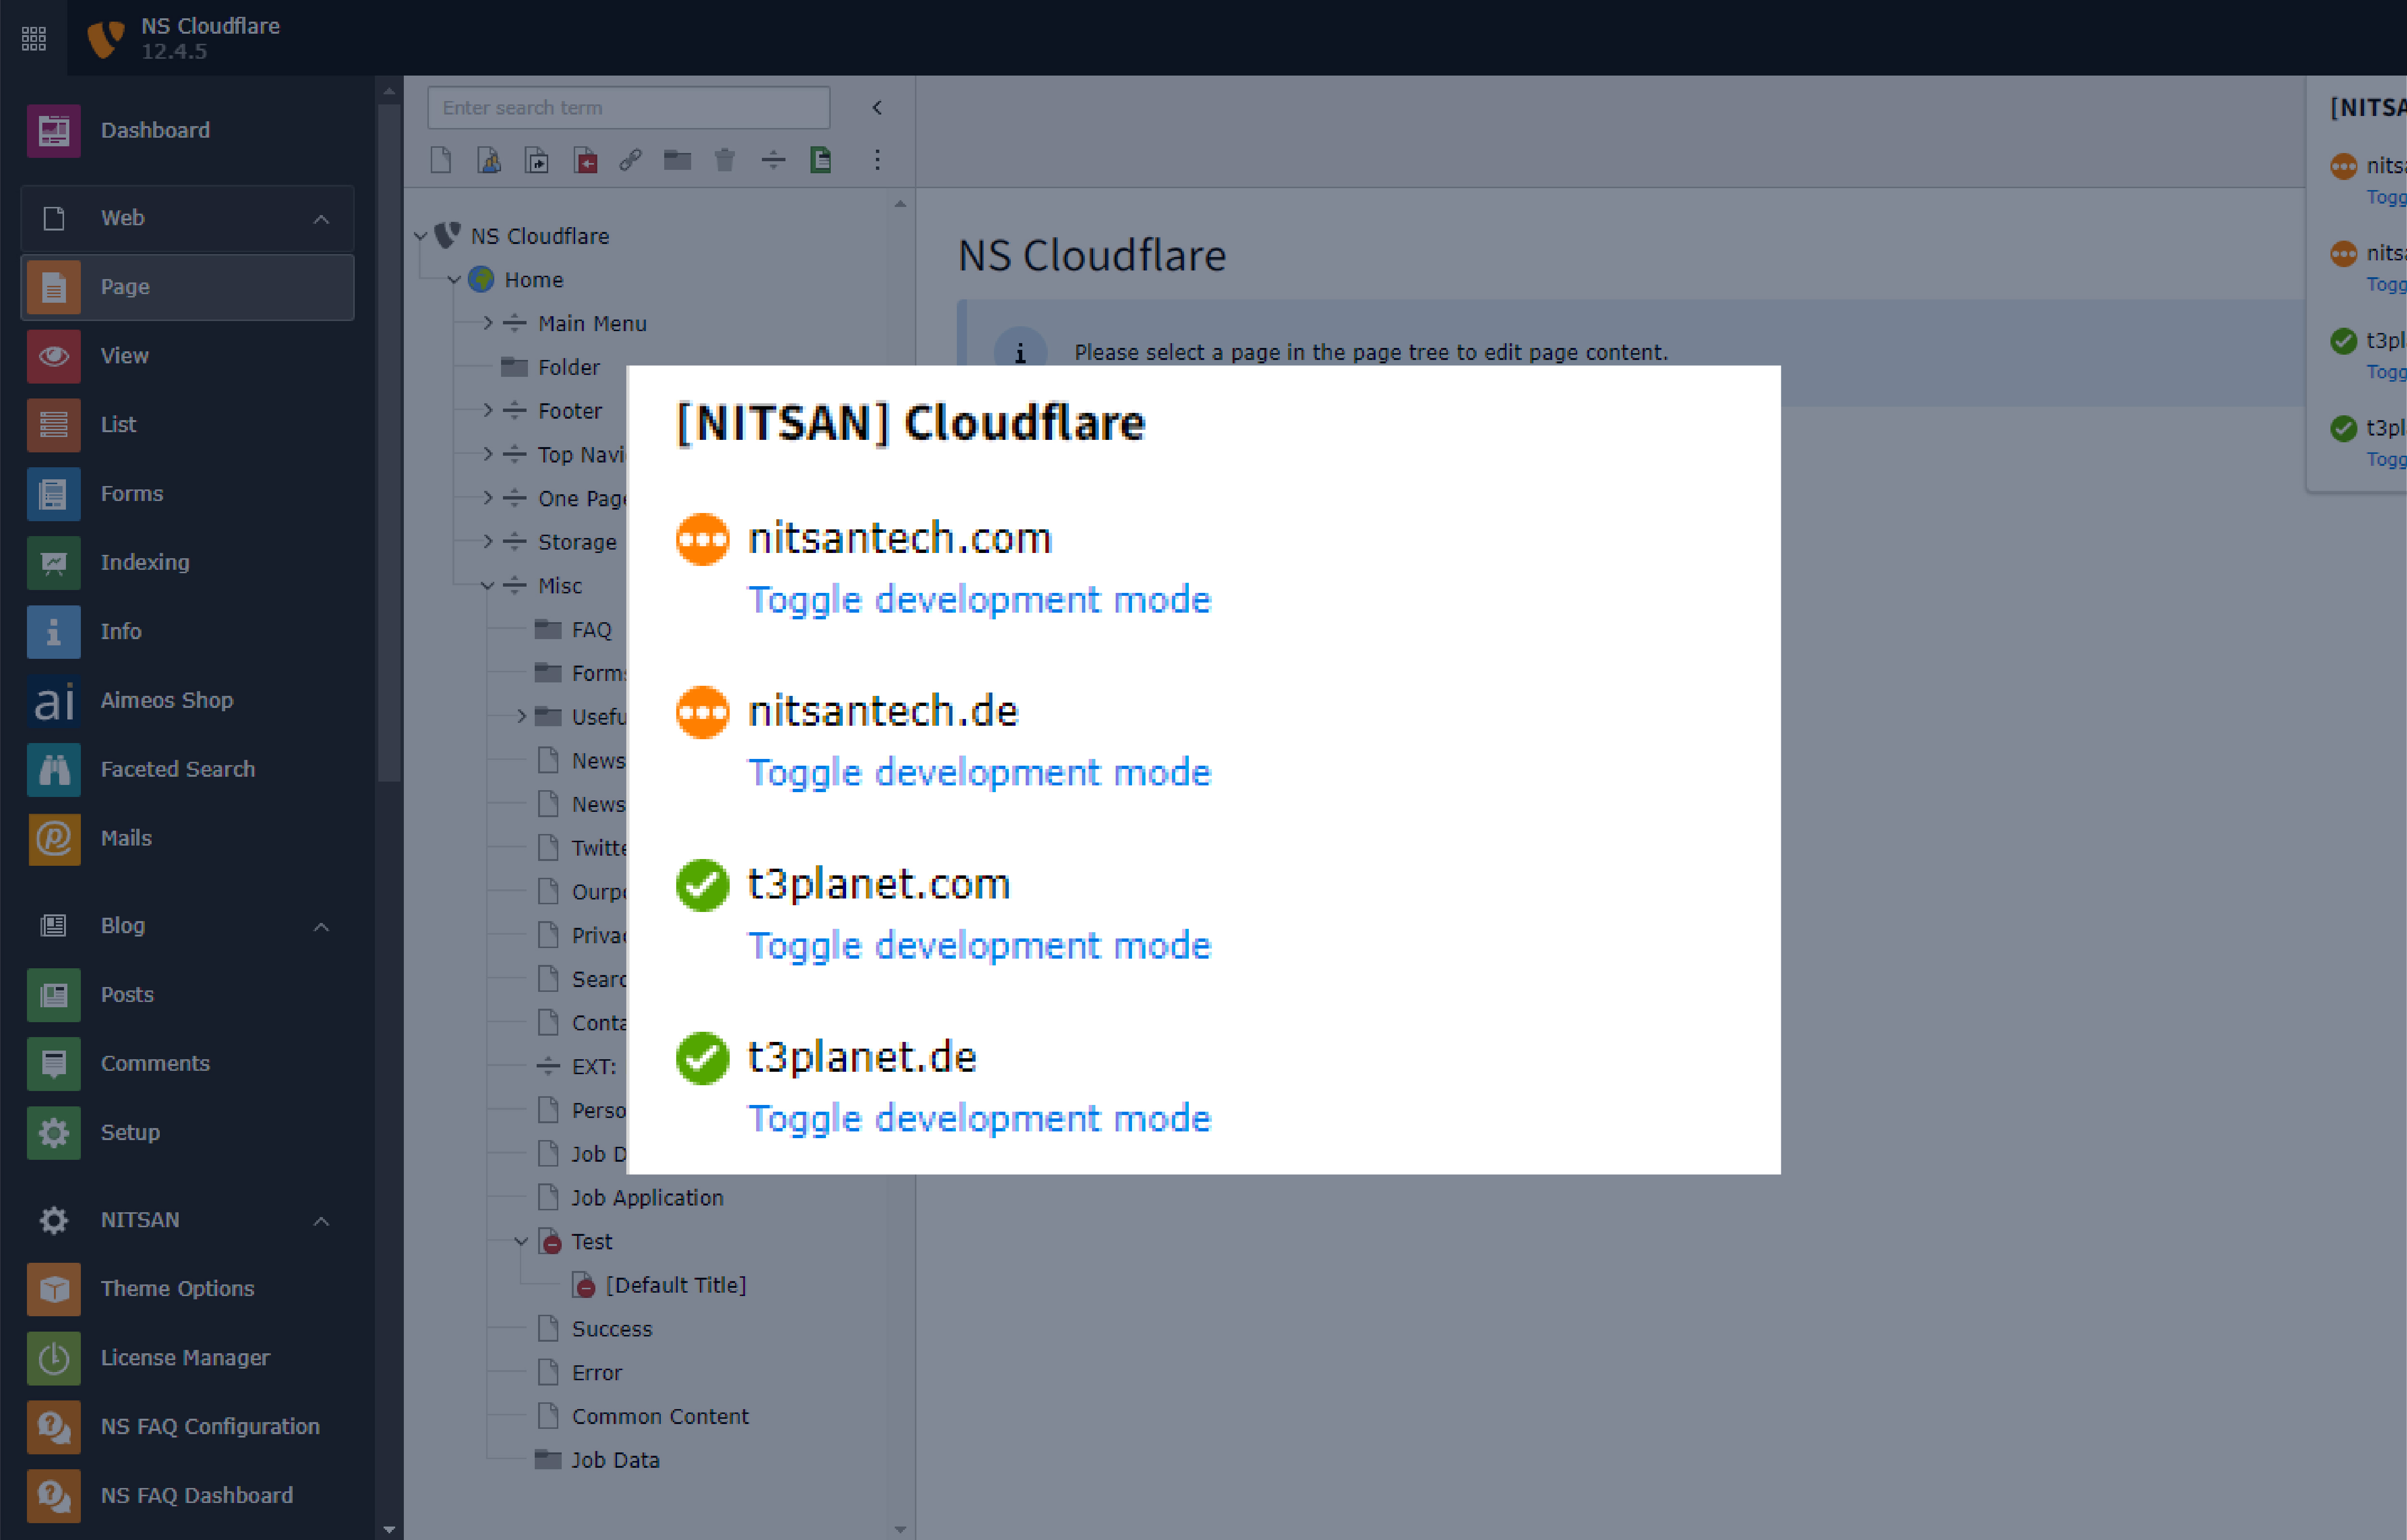
Development Mode Toggle
This allows easy toggling of development mode directly from the TYPO3 Backend.
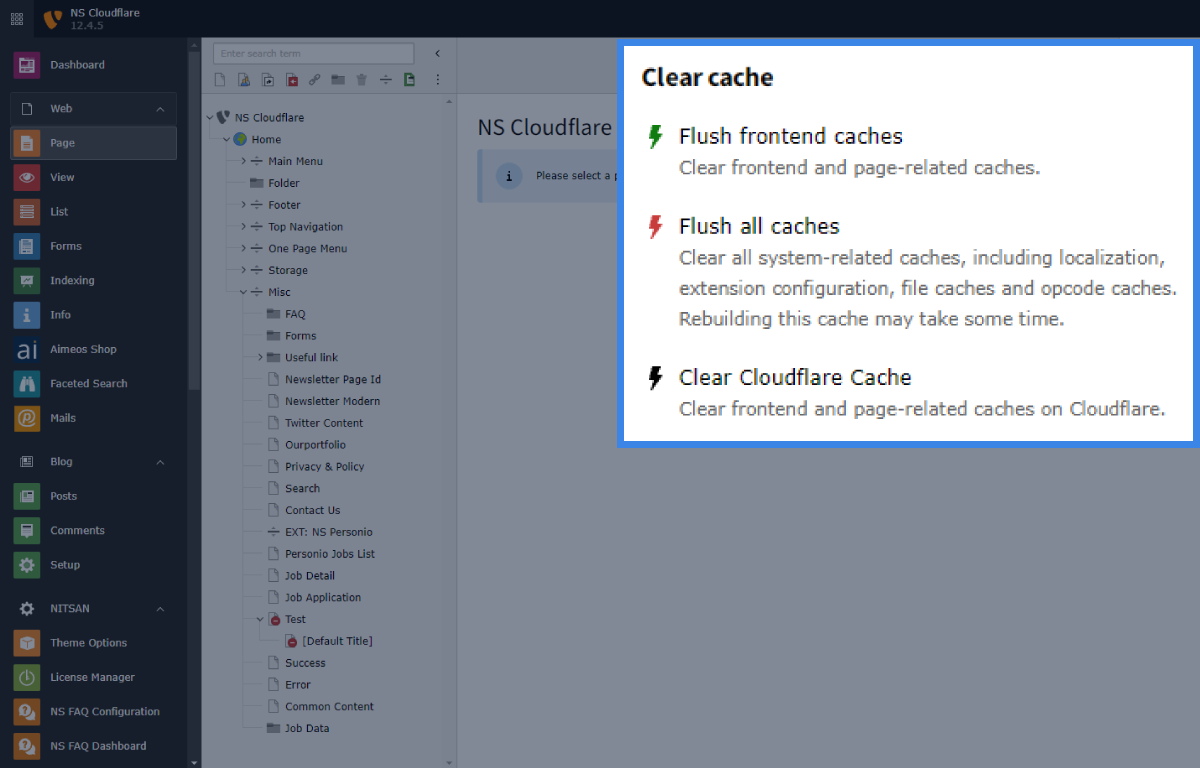
TYPO3 Backend Cache Purge
This effortlessly manage TYPO3 website cache with our Cloudflare Extension
Page-Specific Cache Purge
It clear cache for specific pages directly from the TYPO3 Backend